


.FearLess..
Tip conținut
Profiluri
Forumuri
Calendar
Orice postat de .FearLess..
-
[ CSGO ] - Cerere admin stefiaimbots ( Acceptat )
.FearLess.. a răspuns la topic lui stefiaimbotss1 în Admins
-
, cauta-ma pe discord
-
-
[ CSGO ] - Cerere admin LimonPeCocaina ( Acceptat )
.FearLess.. a răspuns la topic lui LimonPeCocaina în Admins
, activ, pare implicat pe server, merita o sansa -
Deoarece nu am mai oferit de mult timp VIP gratuit, ne-am gândit să redeschidem cererile pentru VIP pe o perioadă scurtă, cu ocazia sfârșitului de vară și a începutului de școală! VIP-ul va fi activ timp de 7 zile din momentul în care cererea este acceptată, oferindu-vă acces la diverse beneficii speciale pe server. Cererile se pot face până duminică, 8 septembrie 2024. Model: Numele tău pe server: Data de naștere: Vârstă: Ore jucate + link GT.RS: Contact: De ce dorești VIP: Ce vă atrage la serverul nostru și de ce ați ales să jucați cu noi?: Informații suplimentare: Cererile pentru VIP se fac în acest topic și sunt deschise până pe 8 septembrie 2024.
-
[RO]: Dupa cum bine stiti au fost cazuri cand s-a efectuat wg-ul, iar in TimeStamp apare alta ora ( uneori si alta data ) cand s-a efectuat WG-ul, de multe ori acest lucru se intampla datorita diferentei orare intre state, orei setate pe calculator sau diverse motive. Pe homepage-ul site-ului Wargods exista o lista cu ultimele teste Wargods efectuate, este de recomandat ca in momentul in care apar diferente orare sa verificam acea lista ( daca respectivul suspect apare trecut in acea lista inseamna ca el a efectuat WG-ul in acel moment, chiar daca ora din TimeStamp este alta ) Ca exemplu vom analiza lista de mai jos: Dupa cum se poate observa orele din TimeStap difera foarte mult ( intre ele ), timpul real la care au fost facute toate acele WG-uri este intre 20:15-20:20. Deci ceea ce e de inteles din aceasta lista este ca mereu cand apar diferente orare si playerul zice ca efectuata WG-ul se poate verifica lista ultimelor WG-uri facute. [EN]: As you well know, there have been cases where the WG (WarGods) was performed, and a different time (sometimes even a different date) appears in the TimeStamp when the WG was executed. Often, this happens due to time zone differences between states, the time set on the computer, or various other reasons.
-
[RO]: 1. Descarcam fisierul 2. Fisierul downloadat cu extensia .dem trebuie sa il copiem in locatia unde avem instalat Counter-Strike, mai precis in folderul cstrike (Exemplu: E:\CS 1.6 Long Horn\cstrike). 3. Daca fisierul downloadat are mai multe cuvinte sau site in nume, ii vom modifica numele astfel incat sa aiba un singur cuvant (Exemplu: fearless.dem). 4. Pornim Counter-Strike 1.6. 5. Pentu a vizualiza demo trebuie sa folosim comanda "playdemo fearless". 6. Ne uitam la demo si ne dam parerea daca are sau nu hack. [EN]: 1. Download the file. 2. The downloaded file with the .dem extension should be copied to the location where Counter-Strike is installed, specifically in the cstrike folder (Example: E:\CS 1.6 Long Horn\cstrike). 3. If the downloaded file has multiple words or spaces in its name, we will modify its name to have a single word (Example: fearless.dem). 4. Start Counter-Strike 1.6. 5. To view the demo, use the command "playdemo fearless". 6. Watch the demo and give your opinion on whether or not the player is hacking.
-
[RO]: Salutare, Mi s-a adus la cunostiinta cum ca serviciul Wargods Cheat Defender (Wargods Scan) au facut un mic update. Din cate am observat acum la CFG-uri , chiar daca nu ai nimic in cstrike, el tot iti gaseste ceva configuri pe care cs-ul tau nu le foloseste ci sunt de la alte programe/drivere. Ei bine, prin acest topic vreau sa anunt STAFF-ul ca urmatoarele .cfg-uri gasite in urma scanului nu vor fi sanctionate ! CFG-urile si cum ar trebui sa arate sunt : Found Too many alias in CFG - unknown status -> Aceasta eroare nu este hack, reprezinta decat ca cfg-ul cuprinde multe linii, in acest caz vei ruga jucatorul sa schimbe config-ul sau cs-ul cu varianta clean. In acelasi timp se poate da ban 10 minute sa faca acest lucru. skill.cfg (MD5: 4A88A6E1B566D1746E458364D03AF3D5) (Size: 7278) (Alias count: 0) (Lines: 393) (Binary: False) -> Whitelisted 3Dfx.cfg (MD5: EA32108EE84736845FAC671C8403BC15) (Size: 1331) (Alias count: 0) (Lines: 36) (Binary: False) -> Whitelisted 3DfxVoodoo1.cfg (MD5: B1DF56C2FA4C6BF5F92393BE578AD216) (Size: 1312) (Alias count: 0) (Lines: 36) (Binary: False) -> Whitelisted 3DfxVoodoo2.cfg (MD5: B1DF56C2FA4C6BF5F92393BE578AD216) (Size: 1312) (Alias count: 0) (Lines: 36) (Binary: False) -> Whitelisted 3Dlabs.cfg (MD5: 7FD68C1CD6505D7C83A52A336286F210) (Size: 1330) (Alias count: 0) (Lines: 34) (Binary: False) -> Whitelisted ATIRage128.cfg (MD5: 1A47243D1E17E287A9FA2D884BA38A03) (Size: 157) (Alias count: 0) (Lines: 4) (Binary: False) -> Whitelisted ATIRage128d3d.cfg (MD5: 1A47243D1E17E287A9FA2D884BA38A03) (Size: 157) (Alias count: 0) (Lines: 4) (Binary: False) -> Whitelisted d3d.cfg (MD5: 7EB6F31BA7C122E6E2EECD51C146605A) (Size: 426) (Alias count: 0) (Lines: 10) (Binary: False) -> Whitelisted geforce.cfg (MD5: A488B1FD9328A51D54F46A925C0224AB) (Size: 63) (Alias count: 0) (Lines: 4) (Binary: False) -> Whitelisted matrox.cfg (MD5: 7AE8579E67B60A274141611DDBF1710D) (Size: 32) (Alias count: 0) (Lines: 2) (Binary: False) -> Whitelisted nvidiad3d.cfg (MD5: 3EED1BE0CB0667E3230FD568BC3F092F) (Size: 100) (Alias count: 0) (Lines: 6) (Binary: False) -> Whitelisted pcx2.cfg (MD5: 7C2D910A94700C4BC996BE0E7BE3D9BB) (Size: 1219) (Alias count: 0) (Lines: 32) (Binary: False) -> Whitelisted PowerVRSG.cfg (MD5: 7C2D910A94700C4BC996BE0E7BE3D9BB) (Size: 1219) (Alias count: 0) (Lines: 32) (Binary: False) -> Whitelisted riva128.cfg (MD5: 1A3736C9AB541F2B863679336477613D) (Size: 1283) (Alias count: 0) (Lines: 33) (Binary: False) -> Whitelisted rivatnt.cfg (MD5: 815488687110FD2650FB723E12AC17B1) (Size: 32) (Alias count: 0) (Lines: 2) (Binary: False) -> Whitelisted rivatntd3d.cfg (MD5: 65A2C0C1A436DB19A93CC990B572CAD6) (Size: 14) (Alias count: 0) (Lines: 1) (Binary: False) -> Whitelisted ↑Acestea sunt CFG-urile in plus gasite de wargods la mine cand am facut scanul, desi eu nu am niciun config ilegal in cstrike, acestea fiind de la placa video/directX si alte programe/drivere. CFG-urile ce apar a fi Whitelisted nu vor fin sanctionate! [EN]: Hello, I've been informed that the Wargods Cheat Defender service (Wargods Scan) has received a small update. From what I've noticed now in the CFGs, even if you don't have anything in the cstrike folder, it still finds some configurations that your CS (Counter-Strike) doesn't use but are from other programs/drivers. Well, through this topic, I want to notify the STAFF that the following .cfg files found during the scan will not be penalized! The CFGs and how they should look are: Found Too many alias in CFG - unknown status -> This error doesn't represent a hack, it only represents that the cfg contains more lines, in this case, you will ask the player to change the config file or cs with the clean variant. After you've told him that, you can ban him for 10 minutes. skill.cfg (MD5: 4A88A6E1B566D1746E458364D03AF3D5) (Size: 7278) (Alias count: 0) (Lines: 393) (Binary: False) -> Whitelisted 3Dfx.cfg (MD5: EA32108EE84736845FAC671C8403BC15) (Size: 1331) (Alias count: 0) (Lines: 36) (Binary: False) -> Whitelisted 3DfxVoodoo1.cfg (MD5: B1DF56C2FA4C6BF5F92393BE578AD216) (Size: 1312) (Alias count: 0) (Lines: 36) (Binary: False) -> Whitelisted 3DfxVoodoo2.cfg (MD5: B1DF56C2FA4C6BF5F92393BE578AD216) (Size: 1312) (Alias count: 0) (Lines: 36) (Binary: False) -> Whitelisted 3Dlabs.cfg (MD5: 7FD68C1CD6505D7C83A52A336286F210) (Size: 1330) (Alias count: 0) (Lines: 34) (Binary: False) -> Whitelisted ATIRage128.cfg (MD5: 1A47243D1E17E287A9FA2D884BA38A03) (Size: 157) (Alias count: 0) (Lines: 4) (Binary: False) -> Whitelisted ATIRage128d3d.cfg (MD5: 1A47243D1E17E287A9FA2D884BA38A03) (Size: 157) (Alias count: 0) (Lines: 4) (Binary: False) -> Whitelisted d3d.cfg (MD5: 7EB6F31BA7C122E6E2EECD51C146605A) (Size: 426) (Alias count: 0) (Lines: 10) (Binary: False) -> Whitelisted geforce.cfg (MD5: A488B1FD9328A51D54F46A925C0224AB) (Size: 63) (Alias count: 0) (Lines: 4) (Binary: False) -> Whitelisted matrox.cfg (MD5: 7AE8579E67B60A274141611DDBF1710D) (Size: 32) (Alias count: 0) (Lines: 2) (Binary: False) -> Whitelisted nvidiad3d.cfg (MD5: 3EED1BE0CB0667E3230FD568BC3F092F) (Size: 100) (Alias count: 0) (Lines: 6) (Binary: False) -> Whitelisted pcx2.cfg (MD5: 7C2D910A94700C4BC996BE0E7BE3D9BB) (Size: 1219) (Alias count: 0) (Lines: 32) (Binary: False) -> Whitelisted PowerVRSG.cfg (MD5: 7C2D910A94700C4BC996BE0E7BE3D9BB) (Size: 1219) (Alias count: 0) (Lines: 32) (Binary: False) -> Whitelisted riva128.cfg (MD5: 1A3736C9AB541F2B863679336477613D) (Size: 1283) (Alias count: 0) (Lines: 33) (Binary: False) -> Whitelisted rivatnt.cfg (MD5: 815488687110FD2650FB723E12AC17B1) (Size: 32) (Alias count: 0) (Lines: 2) (Binary: False) -> Whitelisted rivatntd3d.cfg (MD5: 65A2C0C1A436DB19A93CC990B572CAD6) (Size: 14) (Alias count: 0) (Lines: 1) (Binary: False) -> Whitelisted
-
[RO]: Pentru a se evita spawn kill pe hartile awp_bycastor, aim_map si css_india adminul care a bagat mapa respectiva va folosi comanda amx_freezetime 0 [EN]: To avoid spawn killing on aim_map, awp_bycastor, and awp_india maps, the admin who added the respective map will use the command amx_freezetime 0.
-
[RO]: Harta se schimba folosind comanda: amx_votemap <mapa> <mapa> <mapa> sau amx_votemapmenu unde o sa ne apara o lista cu toate mapele de pe server [ ! ] La vot se da minim 2 harti! Dupa ce votul sa finalizat la intrebarea data ve-ti raspunde cu NU, urmand ca harta sa fie schimbata ulterior prin comanda amx_nextmap sau la sfarsitul rundei (obligatoriu dupa giveaway) dupa anuntarea schimbarii mapei pe y@ cu textul LAST. In acest caz mapa se schimba prin comanda amx_map <harta>. [ ! ] Harta se poate schimba si inainte de Giveaway daca numarul jucatorilor a inceput sa scada foarte mult sau daca solicita majoritatea playerilor acest lucru. [EN]: Players can use the command amx_votemap <mapa> <mapa> <mapa> to initiate a map change, or they can use amx_votemapmenu, which displays a list of all the maps available on the server. [ ! ] For the vote, a minimum of 2 maps must be chosen! After the vote has concluded, you will respond with NO, and then the map will be changed later using the command amx_nextmap or at the end of the round (mandatory after the giveaway) after announcing the map change on y@ with the text LAST. In this case, the map is changed using the command amx_map <map>. [ ! ] The map can be changed before the Giveaway if the number of players starts to decrease significantly or if the majority of players request it.
-
[RO]: Cand un player face reclama intentionat pe server, eventual isi schimba IP/STEAM_ID si nu ia ban/gag veti proceda in felul urmator: 1. Scriem comanda vote in consola 2. Luam id-ul playerului care dorim sa ii dam gag, de exemplu consideram ca a intrat pe numele "KiNG.", deci id-ul este #1169. 3. Executam comanda de gag pe o perioada de 15 minute (amx_gag #1169 15 reclama). 4. Se poate executa si comanda amx_banip #1169 0 reclama. Prima data recomand folosirea gag-ului si daca reuseste sa faca din nou reclama folositi amx_banip, NU amx_ban deoarece nu va functiona. Executarea oricaror comenzi descrise mai sus sunt temporare, jucatorul nu va lua ban oricum si va putea sa isi schimbe ip-ul/steam_id-ul. Scopul este sa scapam de el in acel moment. [EN]: When a player intentionally makes advertising on the server, possibly changes their IP/STEAM_ID, and doesn't receive a ban/gag, you will proceed as follows: 1. Type the command "vote" in the console 2. We take the player's ID whom you want to gag, for example, let's assume they joined with the name "KiNG." So, their ID is #1169. 3. Issue the gag command for a 15-minute duration (amx_gag #1169 15 reclama). 4. The command amx_banip #1169 reclama can also be used. First, I recommend using the gag command, and if the player advertises again, use amx_banip, NOT amx_ban, as it will not work. The execution of any commands described above is temporary, the player will not receive a ban anyways and will be able to change their IP/Steam_ID. The goal is to remove them from the server at that moment. Edited March 21 by puneilapamant
-
[RO]: 1. Folosim combinatia de taste SHIFT + ALT + S. 2. Facem un chenar in jurul imaginii/textului caruia dorim sa ii facem screenshot. 3. Intram pe https://imgur.com/ si apasam combinatia de taste CTRL + V. 4. Imaginea o sa se uploadeze si vom avea un link catre imagine pe care il putem posta oriunde. [EN]: 1. We use the key combination SHIFT + ALT + S. 2. We create a border around the image/text we want to capture by taking a screenshot. 3. We go to https://imgur.com/ and press the key combination CTRL + V. 4. The photo will upload and we will have a link to the image that we can paste wherever. Edited March 21 by puneilapamant
-
Dupa cum zice si titlul aici va voi arata toate comenzile AMXMODX (daca mi-a scapat ceva va rog postati) si un tutorial in care va voi prezente cum sa folositi cele mai importante comenzi. Lista comenzi AMXMODX: 1. amx_addadmin <nume> <parola> <litere> <flags> - adauga un admin 2. amx_addmenu <nume> <meniu> <acces> <info> <numarul> - adauga un meniu 3. amx_addmenuitem <nume> <plugin> <nume> <item> <flags> <acces> <afiseaza><toate> <arg> - adauga un element in meniu 4. amx_ban <nume> <minute> [Motiv] 5. amx_banmenu - afiseaza meniul de banare 6. amx_cfg <numefisier> 7. amx_cfgmenu - afiseaza meniul configurilor 8. amx_cvar <cvar> [valoare] 9. amx_cvarmenu - afiseaza meniul comenzilor cvar 10. amx_exec <nume> 11. amx_gag <authid> <a> [timp] 12. amx_help - afiseaza aceste comenzi de ajutor 13. amx_banip <nume> <minute> - ban pe ip (valoarea 0 la minute este ban permanent) 14. amx_kick <nume> [Motiv] - da afara jucatorul 15. amx_kickmenu - afiseaza meniul de deconectare a unui jucator 16. maps * - lista hartilor care pot fi alese. 17. amx_makeadmin <nume> [litere de acces] - i dai unui jucator puterea de a avea admin pana se schimba harta 1. Comenzile de ban : Aceste comenzi le putem grupa in doua categorii si anume: I. Comenzi pe care le aplicam atunci cand jucatorul E PE SERVER: 1.a - amx_ban "STEAM:ID" time "reason" 1.b - amx_banip nick time "reason" 1.c - amx_banip "nick din 2 cuvinte" time "reason" 1.d - amx_banip #nr.ID time "reason" II. Comenzi pe care le aplicam atunci cand jucatorul A IESIT DE PE SERVER: 1.e - amx_addban Nick "STEAM:ID" time "reason" - cu Advanced Bans / amx_addban "STEAM:ID" time "reason" - fara Advanced Bans 1.f - amx_addban nick IP time "reason" / amx_addban nick time "reason" 1.g - amx_addban "nick din 2 cuvinte" IP time "reason" La comenzile 1.a/c/e/g intotdeauna sa se foloseasca OBLIGATORIU [ "" ] ! In cazul playerilor cu numele gen : A , * , ç , § , sau atunci cand doi jucatori de pe server au nume asemenatoare (de ex. Player, respectiv (1)Player) - se folosesc comenzile vote / status se ia nr.ID si se aplica comanda 1.d . 2. Comenzi referitoare la vizualizarea / recupererarea IP-urilor ! 2.a - amx_showip / status - afiseaza IP-urile celor conectati pe server 2.b - amx_last - afiseaza IP-urile celor care au iesit de pe server 3. Folosirea ESP-ului la cote maxime [ Accesul in meniul ESP se face pe tasta R , numai cand esti dead ( mort ) ] : 3.a - Folosirea ESP-ului in cazul in care facem un demo unui suspect de Wall : - In acest caz avem nevoie decat de nr.2 - ON , restul OFF ! Practic ne intereseaza decat adversarii si nimic mai mult ! Cu nr 2 ON putem vedea casutele verzi de la adversari prin pereti , cutii etc . In acest fel obtinem un demo cat mai clar , cat mai concludent incat claritatea e maxima si ne folosim de ESP atat cat avem nevoie ! 3.b - Folosirea ESP-ului atunci cand facem un demo unui suspect de Aim : - In aceasta situatie practic nu avem nevoie de ESP , el trebuie trecut pe OFF ( din sagetile UP / DOWN ; ON / OFF ) deoarece tinta / reculul trebuie sa ramana cat mai clare pentru a judeca fazele cat mai corect ! 4. Cum se realizeaza ss-urile cat mai concludente ! 4.a - Intotdeauna SS-urile se realizeaza fiind spectator ! Inainte de a face SS recomand in a urmari 2...3 runde stilul de joc si de a judeca daca e vorba de skill sau cod . - Niciodata SS-urile nu se fac in timp ce jucati pentru ca nu stiti pozitia exacta a suspectului ! - Niciodata nu se fac SS-urile in baza ! Ele se fac numai atunci cand are in fata sa prin perete , cutie , poarta cel putin un adversar ! 5. Explicatii si indicii la recunoasterea celor care folosesc coduri ( Wall , Aim , Norecoil , Silent - Aim , Anti-ss) 5.a - Cand vorbim de Wall , intotdeauna ESP ON ( doar nr 2 : ON ) . Wall-ul nu se rezuma doar la urmarirea adversarilor prin perete , indiferent ca le face sau nu damage ... De exemplu la jucatorii mai experimentati gasim wall ON / OFF unde e mult mai greu sa realizezi un demo cu faze concludente ! Wall-ul se poate deduce si din fazele unde el se retrage ( se fereste de multime " adversari " ) , umbla cu he-ul in mana toata mapa pana prinde in raza un adversar , nu pierde niciodata adversarii de pe monitor si astfel situatiile pot fi mult mai multe ! 5.b - Cand vorbim de Aim , intotdeauna ESP OFF incat sa avem cat mai clara imaginea . Aim-ul intotdeauna e setat pe cap /piept se poate recunoaste foarte usor, deoarece miscarile tintei sunt bruste, sare de pe om pe om. 5.c - Norecoil - se poate observa la viteza normala sau in slowmotion (viewdemo nick.dem) atunci cand suspectul apasa ! Daca playerul suspect trage rafale de cate 3..4 gloante se vede foarte greu ! Gloantele se duc liniar iar fiecare glont urmareste tinta, recuul armei fiind absent . De asemenea experienta adminului isi spune cuvantul ! 5.d - Silent-Aim - cum ii spune si numele are caracteristicile unui aim numai ca e mult mai " silentios " . Nu mai apar acele miscari bruste de pe un adversar pe altu ! Totusi, se observa cum tinta este fortata pe adversar, iar atunci cand are in fata 2 adversari si ii apasa , tinta incepe sa devina haotica miscandu-se in zig zag. De asemenea in acest caz nu mai exista recul la arma ... si aici depinde de experienta adminului ! 5.e - Anti-ss - Aici este vorba despre un script care face in acelasi timp o copie a asa-ziselor SS-uri , insa fara cod ! Acest script se activeaza / dezactiveaza dupa fiecare ss in parte incat creeaza intre poze o mica eroare de timp ! 6. Comenzile cvar ! 6.a - amx_cvarmenu - arata comenzile cvar care sunt bagate pe server ! 6.b - amx_cvar mp_autokick - daca e activat, da automat kick la spectatori ! - am_cvar mp_autokick 0 dezactivat - amx_cvar mp_autokick 1 activat(default) 6.c - amx_cvar mp_autoteambalance - face sa fie automat acelasi nr de jucatori la fiecare echipa - amx_cvar mp_autoteambalance 1 activat - amx_cvar mp_autoteambalance 0 dezactivat 6.d - amx_cvar mp_buytime - specifica limita in secunde pana cand jucatorii pot cumpara arme , grenazi (de la inceputul rundei) ! - amx_cvar mp_buytime 15 (default) 6.e - amx_cvar mp_c4timer - specifica numarul de secunde care trec pana explodeaza bomba ! - amx_cvar mp_c4timer 35 - C4 explodeaza in 35 de secunde ! 6.g - amx_cvar mp_freezetime - inainte de a incepe runda, playerii stau frozen(default) - amx_cvar mp_freezetime 3 - se foloseste pe hartile unde se cumpara arme - amx_cvar mp_freezetime 0 - se foloseste pe hartile fy_ / awp _ 6.h - amx_cvar mp_friendlyfire - se poate ( face / sau nu ) damage intre coechipieri - amx_cvar mp_friendlyfire 0 - OFF - amx_cvar mp_friendlyfire 1 - ON 6.j - amx_cvar mp_roundtime - seteaza durata fiecarei runde Exemple: - amx_cvar mp_roundtime 1 - runda dureaza 1 minut - amx_cvar mp_roundtime 1.75 - runda dureaza 1:45 6.k - amx_cvar mp_timelimit - cat timp ruleaza harta pe server - amx_cvar mp_timelimit 0 - harta care este la momentul respectiv , ruleaza pe timp nelimitat ! - amx_cvar mp_timelimit 30 / 35 / 40 - harta ruleaza 30 / 35 / 40 de minute dupa care se va schimba automat ! 7. - Tehnici care ajuta la creearea unui demo perfect cu faze concludente ! 7.a - Aici ne punem in situatia cand nu putem sta spectator ( serverul nu o permite / adminii nu permit / admin suspect ) ! - De ex. vreau sa fac un demo unui alt admin si de frica sa nu treaca codurile pe OFF , fac un demo in timp ce ma joc ! Cand incepe runda , imi dau kill si cu demo on direct pe el ma pun sau faceti rush cu usp-ul / glock-ul incat sa mori primul dar sa ai timp sa prinzi si faze cat mai clare cu suspectul ! -Sau mai simplu setez menu de cumparare pe Old style menus | Options=Multiplayer=Advanced=Buy menu mod= selectam Old Style menus 7.b - Comenzile pentru a crea un demo : - record nume ( incepe inregistrarea demo-ului ) - stop ( opreste inregistrarea demo-ului ) Demo-ul se salveaza sub denumirea de nume.dem si il gasiti : - C - Program Files - CS 1.6 - strike [ VALVE ] - C - Program Files - Steam - steammaps - IDsteam - Counter-Strike - cstrike [ STEAM ] ** Depinde in ce partitie ati instalat jocul 8. - Cum facem sa vizualizam un demo in slow-motion ! 8.a - Deschiderea demo-ului se face prin comanda viewdemo nick.dem ! - Dupa ce aplicam aceasta comanda , incepe de ruleze demo-ul dar avem si o bara de optiuni din care dirijam demo-ul prin : * Pauza * Play * Viteza inainte : x2 ; x4 * Viteza inapoi : 1/2 ; 1/4 (slowmotion) Vizualizarea demo-urilor in slowmotion ajuta la prinderea celor cu No-recoil si nu numai ! 9. - Comenzile folosite pentru schimbarea hartii : Lucruri esentiale pe care orice admin trebuie sa le cunoasca inainte de a derula un vot : 9.a - Votul se da in ultimele 5 minute ale hartii . Pentru a afla timpul ramas folosim comanda timeleft . 9.b - Inainte de a se vota se consulta si se tine cont de opiniile celorlati admini , dar si de cele ale jucatorilor . 9.c - In mod obligatoriu inaintea de consultare se verifica ultimele harti jucate prin comanda /harti . 9.d - Comanda de vot: - amx_voteamp <harta1> <harta2> Ex: amx_voteamp de_dust2 de_inferno * Se pot vota pana la 5 harti , dar nu este indicat pentru ca exista mari sanse ca votul sa esueze din cauza lipsei votului majoritar asupra uneia . 9.e - Comanda de schimbare a hartii: - amx_map <harta> Ex: amx_map de_dust2 * In acest caz se pune harta care a fost aleasa in cadrul votului . [EN]: As the title suggests, here I will show you all the AMXMODX commands (if I missed something, please post it) and a tutorial in which I will present how to use the most important commands. AMXMODX Commands List: 1. amx_addadmin \<name> \<password> \<letters> \<flags> - add an admin 2. amx_addmenu \<name> \<menu> \<access> \<info> \<number> - add a menu 3. amx_addmenuitem \<name> \<plugin> \<name> \<item> \<flags> \<access> \<display> \<all> \<arg> - add an item to the menu 4. amx_ban \<name> \<minutes> [Reason] 5. amx_banmenu - display the ban menu 6. amx_cfg \<filename> 7. amx_cfgmenu - display the configuration menu 8. amx_cvar \<cvar> [value] 9. amx_cvarmenu - display the cvar commands menu 10. amx_exec <name> 11. amx_gag <authid> <a> [time] 12. amx_help - display these help commands 13. amx_banip <name> <minutes> - ban by IP (0 minutes for a permanent ban) 14. amx_kick <name> [Reason] - kick the player 15. amx_kickmenu - display the kick menu 16. maps * - list of maps that can be chosen 17. amx_makeadmin <name> [access letters] - give a player admin power until the map changes 1. Ban Commands: These commands can be grouped into two categories: I. Commands applied when the player is ON THE SERVER: 1.a - amx_ban "STEAM:ID" time "reason" 1.b - amx_banip nickname time "reason" 1.c - amx_banip "two-word nickname" time "reason" 1.d - amx_banip #nr.ID time "reason" II. Commands applied when the player HAS LEFT THE SERVER: 1.e - amx_addban Nick "STEAM:ID" time "reason" - with Advanced Bans / amx_addban "STEAM:ID" time "reason" - without Advanced Bans 1.f - amx_addban nickname IP time "reason" / amx_addban nickname time "reason" 1.g - amx_addban "two-word nickname" IP time "reason" For commands 1.a/c/e/g, it is always MANDATORY to use [""]! In the case of players with names like A, *, ç, §, or when two players on the server have similar names (e.g., Player and (1)Player), use the vote/status commands to get the player's number (nr.ID) and apply command 1.d. 2. Commands related to viewing / retrieving IPs! 2.a - amx_showip / status - displays the IPs of those connected to the server 2.b - amx_last - displays the IPs of those who have left the server Using ESP at maximum levels [Access to the ESP menu is done with the R key, only when you are dead]: 3.a - Using ESP when creating a demo of a Wallhack suspect: In this case, we only need number 2 - ON, the rest OFF! Essentially, we are only interested in opponents and nothing more! With number 2 ON, we can see the green boxes of opponents through walls, boxes, etc. This way, we obtain a demo that is as clear and conclusive as possible, ensuring maximum clarity, and we use ESP only as needed! 3.b - Using ESP when creating a demo of an Aimbot suspect: In this situation, we practically don't need ESP; it should be set to OFF (using the UP/DOWN arrows; ON/OFF) because the target/recoil should remain as clear as possible to judge the situations more accurately! 4. How to capture the most conclusive screenshots (SS)! 4.a - Screenshots (SS) are always taken while being a spectator! Before taking an SS, I recommend observing the gameplay style for 2...3 rounds and judging whether it's a matter of skill or cheating. - Never take screenshots while playing because you don't know the exact position of the suspect! - Never take screenshots in the base! They are taken only when there is at least one opponent in front through a wall, box, gate, etc. 5. Explanations and clues for recognizing those who use cheats (Wall, Aim, NoRecoil, Silent-Aim, Anti-SS) 5.a - When talking about Wall hacks, always have ESP ON (only number 2: ON). Wall hacks are not just about tracking opponents through walls, whether they cause damage or not. For example, in more experienced players, you may find Wall hacks turning ON/OFF, making it much harder to create conclusive demo footage! Wall hacks can also be deduced from situations where the player retreats (avoids the crowd of "opponents"), moves around the map with a grenade in hand until they spot an opponent within range, never losing sight of opponents on the monitor, and thus, situations can vary greatly! 5.b - When talking about Aim hacks, always have ESP OFF to have a clearer picture. Aim hacks are always set on the head/chest and can be easily recognized because the movements of the target are abrupt, jumping from one person to another. 5.c - NoRecoil can be observed at normal speed or in slow motion (viewdemo nick.dem) when the suspect shoots! If the suspect fires bursts of 3..4 bullets, it's challenging to see! Bullets go linearly, and each bullet follows the target, with no recoil from the weapon. Also, the admin's experience plays a role! 5.d - Silent-Aim, as the name suggests, has the characteristics of an aim hack, but it's much more "silent". There are no more abrupt movements from one opponent to another! However, it is observed that the target is forced onto the opponent, and when facing two opponents and pressing the button, the target starts to become chaotic, moving in a zigzag. Also, in this case, there is no recoil on the weapon, and it depends on the admin's experience! 5.e - Anti-SS is about a script that simultaneously creates a copy of the so-called screenshots (SS) but without the cheat visuals! This script is activated/deactivated after each screenshot, creating a small time discrepancy between the images! 6. CVAR Commands! 6.a - amx_cvarmenu - displays the cvar commands set on the server! 6.b - amx_cvar mp_autokick - if enabled, automatically kicks spectators! - amx_cvar mp_autokick 0 - disabled - amx_cvar mp_autokick 1 - enabled (default) 6.c - amx_cvar mp_autoteambalance - automatically balances the number of players on each team - amx_cvar mp_autoteambalance 1 - enabled - amx_cvar mp_autoteambalance 0 - disabled 6.d - amx_cvar mp_buytime - specifies the limit in seconds until players can buy weapons, grenades (at the beginning of the round)! - amx_cvar mp_buytime 15 (default) 6.e - amx_cvar mp_c4timer - specifies the number of seconds until the bomb explodes! - amx_cvar mp_c4timer 35 - C4 explodes in 35 seconds! 6.g - amx_cvar mp_freezetime - before the round starts, players stay frozen (default) - amx_cvar mp_freezetime 3 - used on maps where weapons are purchased - amx_cvar mp_freezetime 0 - used on fy_ / awp_ maps 6.h - amx_cvar mp_friendlyfire - enables/disables damage between teammates - amx_cvar mp_friendlyfire 0 - OFF - amx_cvar mp_friendlyfire 1 - ON 6.j - amx_cvar mp_roundtime - sets the duration of each round Examples: - amx_cvar mp_roundtime 1 - the round lasts 1 minute - amx_cvar mp_roundtime 1.75 - the round lasts 1:45 6.k - amx_cvar mp_timelimit - how long the map runs on the server - amx_cvar mp_timelimit 0 - the current map runs indefinitely! - amx_cvar mp_timelimit 30 / 35 / 40 - the map runs for 30 / 35 / 40 minutes, after which it will automatically change! 7. Techniques to Create a Perfect Demo with Conclusive Moments! 7.a - In this situation, we find ourselves when we cannot stay as a spectator (the server doesn't allow it / admins don't permit it / suspect admin). - For example, I want to create a demo of another admin, and for fear that the codes will be turned off, I create a demo while playing! When the round starts, I kill myself, and with the demo on, I focus directly on the suspect. Alternatively, rush with a usp or glock to die first but have time to capture clear moments with the suspect! - Or, more simply, set the buy menu to Old Style menus | Options = Multiplayer = Advanced = Buy menu mod = select Old Style menus. 7.b - Commands to create a demo: - `record name` (starts recording the demo) - `stop` (stops recording the demo) The demo is saved under the name name.dem, and you can find it: - C - Program Files - CS 1.6 - strike [VALVE] - C - Program Files - Steam - steammaps - SteamID - Counter-Strike - cstrike [STEAM] ** Depends on which partition you installed the game. 8. - How to View a Demo in Slow Motion! 8.a - Opening the demo is done with the command `viewdemo nick.dem`! - After applying this command, the demo starts to play, but we also have an options bar where we control the demo through: * Pause * Play * Forward speed: x2; x4 * Backward speed: 1/2; 1/4 (slow motion) Viewing demos in slow motion helps catch those with No-recoil and more! 9. - Commands Used for Map Change: Essential things every admin should know before initiating a vote: 9.a - Voting occurs in the last 5 minutes of the map. To find out the remaining time, use the command `timeleft`. 9.b - Before voting, consult and consider the opinions of other admins and players. 9.c - Mandatory before consultation is checking the last played maps using the command `/maps`. 9.d - Vote command: - `amx_voteamp <map1> <map2>` Example: `amx_voteamp de_dust2 de_inferno` * Up to 5 maps can be voted on, but it is not recommended because there is a high chance that the vote will fail due to the lack of a majority vote for one map. 9.e - Map change command: - `amx_map <map>` Example: `amx_map de_dust2` * In this case, the map chosen during the vote is set.
-
[RO]: Ca sa facem un demo trebuie sa urmam cu atentie urmatorii pasi: Scrieti in consola „record nume” (numele playerului caruia ii faci demo, sa zicem ca nick-ul lui este resursecs ex: record resursecs) 1. Lasati camera pe player-ul respectiv. 2. Cand vreti sa opriti demo-ul scrii in consola „stop” 3. Pentru a vizualiza demo scrieti in consola „playdemo nume”, in cazul de fata resursecs ex: „playdemo resursecs ” sau „viewdemo nume” Daca descarcati demo din alta parte il copiati in (……./Counter Strike 1.6/cstrike) Adaugari: Demo-ul se va salva in locatia unde aveti downloadat cs-ul in subfolderul Cstrike (Exemplu: E:\CS 1.6 Long Horn\cstrike) Numele fisierului va fi cel ce l-ati scris dupa comanda record ( cand ati realizat demo ), iar el va fi cu extensia .dem ( exemplu: resursecs.dem ) Acest demo voi trebuie sa il uploadati pe un site ( girlshare/google drive ) si pe urma sa-l postate in banlist drept dovada Tutorial Video: [EN]: To create a demo, you need to carefully follow these steps: 1. Type in the console: `record name` (the name of the player for whom you are creating the demo; let's say his nickname is "resursecs," so type: `record resursecs`). 2. Keep the camera on that player. 3. When you want to stop the demo, type in the console: `stop`. 4. To view the demo, type in the console: `playdemo name`, in this case, `resursecs` (for example: `playdemo resursecs` or `viewdemo name`). If you download a demo from elsewhere, copy it to (……./Counter Strike 1.6/cstrike). Additions: - The demo will be saved in the location where you downloaded CS, in the subfolder Cstrike (Example: E:\CS 1.6 Long Horn\cstrike). - The filename will be the one you wrote after the record command (when you created the demo), and it will have the .dem extension (for example: resursecs.dem). - You will need to upload this demo to a site (like girlshare/google drive) and then post it in the banlist as evidence. Video Tutorial:
-
[RO]: Comanda pentru a schimba numele unui jucator este amx_nick "nick" "nick nou" Daca jucatorul are caractere speciale o sa se foloseasca comanda vote in consola, apoi tastam amx_nick "#1234" "nick nou" Dupa ce executati comanda amx_nick, se va da kick de pe server pentru a-i putea fi schimbat nickname-ul ! amx_kick "nick" [EN]: The command to change a player's name is `amx_nick "old_nick" "new_nick"`. If the player has special characters in their name, you will use the vote command in the console, and then type: `amx_nick "#1234" "new_nick"` After executing the `amx_nick` command, the player will be kicked from the server to change their nickname. `amx_kick "nick"` is used to kick a player with a specific nickname.
-
Tutorial executare comenzi pe playeri cu caractere speciale.
.FearLess.. a postat un topic în * Tutorials
[RO]: 1. Scriem comanda vote in consola 2. Luam id-ul jucatorului care dorim sa ii dam gag, de exemplu consideram ca a intrat pe numele "KiNG.", deci ID-ul este #1169 3. Executam comanda amx_gag #1169 15 reclama Se executa orice comanda in felul umator, de preferabil, cand jucatorul are caractere speciale in nume sau acesta este prea scurt. [EN]: 1. Type the `vote` command in the console. 2. Take the player's ID whom you want to gag. For example, let's assume the player entered the name "KiNG.", so the ID is #1169. 3. Execute the command `amx_gag #1169 15 reklama`. Execute any command in the following manner, preferably when the player has special characters in their name or if the name is too short. Edited March 21 by puneilapamant -
Cum dam ban unui jucator care a iesit de pe server
.FearLess.. a răspuns la topic lui .FearLess.. în * Tutorials
[RO]: Comenzile de ban folosite pentru 'advanced_bans' sunt urmatoarele: amx_ban "nume, #userid sau steamid" "timp in minute" "motiv" amx_banip "nume sau #userid" "timp in minute" "motiv" amx_addban "nume" "steamid sau ip" "timp in minute" "motiv" amx_unban "steamid sau ip" Valori fixe folosite pentru banare: 60 minute = 1 ora 1440 minute = 1 zi 10080 minute = 1 saptamana 43200 minute = 1 luna 0 minute = permanent [ ! ] Important: 1. Pentru a vedea ip-ul si steamid-ul jucatorilor de pe server folositi comenzile amx_showip si status in consola. Daca jucatorul pe care vreti sa il banati nu mai este pe server folositi comanda amx_last in consola pentru a vedea ip-ul si steamid-ul acestuia 2. Pentru a vedea userid-ul jucatorilor de pe server folositi in consola comanda listplayers unde veti observa userid-ul si numele acestora, sau comanda status unde se va observa userid-ul imediat dupa numele acestora. Comenzile pe userid se folosesc cu # in fata acestuia (vezi punctul 8.) 3. Comenzile amx_ban si amx_banip se folosesc doar cand jucatorul care vreti sa-l banati este pe server ! 4. Comanda amx_ban este doar pentru a da ban pe steamid ! Daca jucatorul respectiv nu are steamid (adica STEAM_ID_LAN) veti primi urmatorul mesaj cand incercati sa-l banati: [AdvancedBans] [ ADMIN ] Target has not authorized with the server! Unable to ban! Deci folositi comanda amx_banip pentru cei care nu au steamid ! 5. Pentru a da ban permanent scrieti la timp valoarea 0 nu 9999999 sau alte valori 6. Pentru a da ban pe steamid este obligatoriu sa puneti " inainte si dupa steamid . 7. Comanda amx_addban pe IP functioneaza doar daca jucatorul nu este pe server ! Exemple de ban/unban: amx_addban Chiorul 93.121.345.12 0 aim -> Nu merge cand jucatorul este pe server amx_addban "Gigi Lautarul" 93.121.345.12 0 "neprezentare ss" -> Nu merge cand jucatorul este pe server amx_addban Xulescu "STEAM_0:3:15263759" 0 speed -> Merge si cand jucatorul este pe server amx_addban "Aragaz cu ochi" "STEAM_0:3:15263759" 0 wall -> Merge si cand jucatorul este pe server amx_banip Tralala 0 aim (va lua ban direct pe ip) -> comanda folosita doar cand jucatorul este pe server amx_ban URSU 0 wall (va lua ban direct pe steamid daca are) -> comanda folosita doar cand jucatorul este pe server amx_banip #17258 0 speed (va lua ban direct pe ip) -> comanda folosita doar cand jucatorul este pe server amx_ban #17343 0 aim (va lua ban direct pe steamid daca are) -> comanda folosita doar cand jucatorul este pe server amx_unban 93.121.345.12 amx_unban "STEAM_0:3:15263759" Dupa cum se vede, cand jucatorul are steamid sau doua nume trebuie pus " inainte si dupa acestea. In cazul numelui, mai simplu puteti scrie o parte din nume si merge banat in acest fel. Clarificari: Comanda amx_ban baneaza jucatorul pe steamid Comanda amx_banip baneaza jucatorul pe IP Cand se scrie steamid-ul in consola mereu o sa se puna ghilimele ( altfel comanda nu va functiona ) [EN]: The ban commands used for 'advanced_bans' are as follows: amx_ban "name, #userid or steamid" "time in minutes" "reason" amx_banip "nume or #userid" "time in minutes" "reason" amx_addban "nume" "steamid or ip" "time in minutes" "reason" amx_unban "steamid or ip" Fixed values used for banning: 60 minutes = 1 hour 1440 minutes = 1 day 10080 minutes = 1 week 43200 minutes = 1 month 0 minutes = permanent [ ! ] Important: 1. To view the IP and SteamID of players on the server, use the commands amx_showip and status in the console. If the player you want to ban is no longer on the server, use the command amx_last in the console to see their IP and SteamID. 2. To view the UserID of players on the server, use the command listplayers in the console, where you will see their UserID and names, or use the command status where the UserID will be immediately after their names. Commands on UserID are used with # in front of it (see point 8). The commands amx_ban and amx_banip are to be used only when the player you want to ban is currently on the server! The amx_ban command is specifically for banning based on SteamID! If the respective player does not have a SteamID (i.e., STEAM_ID_LAN), you will receive the following message when attempting to ban them: [AdvancedBans] [ ADMIN ] Target has not authorized with the server! Unable to ban! Therefore, use the amx_banip command for those who do not have a SteamID! 5. To give a permanent ban, enter the value 0, not 9999999 or other values. 6. To ban by SteamID, it is mandatory to place " before and after the SteamID. 7. The amx_addban command on IP only works if the player is not on the server! Examples of ban/unban: 1. `amx_addban Chiorul 93.121.345.12 0 aim` -> Does not work when the player is on the server. 2. `amx_addban "Gigi Lautarul" 93.121.345.12 0 "no screenshot presence"` -> Does not work when the player is on the server. 3. `amx_addban Xulescu "STEAM_0:3:15263759" 0 speed` -> Works even when the player is on the server. 4. `amx_addban "Aragaz cu ochi" "STEAM_0:3:15263759" 0 wall` -> Works even when the player is on the server. 5. `amx_banip Tralala 0 aim` (will take a ban directly on the IP) -> Command used only when the player is on the server. 6. `amx_ban URSU 0 wall` (will take a ban directly on the SteamID if available) -> Command used only when the player is on the server. 7. `amx_banip #17258 0 speed` (will take a ban directly on the IP) -> Command used only when the player is on the server. 8. `amx_ban #17343 0 aim` (will take a ban directly on the SteamID if available) -> Command used only when the player is on the server. 9. `amx_unban 93.121.345.12` 10. `amx_unban "STEAM_0:3:15263759"` As seen, when the player has a SteamID or two names, you need to use " before and after them. In the case of the name, you can simply write a part of the name, and it will still work for banning in this way. Clarifications: The command `amx_ban` bans the player based on SteamID. The command `amx_banip` bans the player based on IP. When entering the SteamID in the console, quotation marks must always be used (otherwise, the command will not work). -
1. Scriem in consola amx_last si o sa apara o lista cu playerii care au iesit de pe server, aici vom copia numele playerului care dorim sa il banam 2. Scriem in consola : amx_addban " dupa care, imediat dupa " facem click dreapta apoi click stanga pe paste. Dupa ce a fost introdus numele complet al jucatorului,punem din nou " .(eu personal scriu amx_addban " " apoi readuc cursorul intre cele doua " " pentru a da paste.) 3. La acest stadiu ,vom avea deci : amx_addban 4.Continuam scrierea comenzii , cu STEAMid-ul jucatorului , care apare pe aceasi linie cu numele , in ordinea: nume-steamID. Selectam STEAM_ID , dam copy ( Atentie, doar cu mouse-ul funtioneaza shortcut CTRL+C! ) apoi dam paste in continuarea fragementului de comanda deja scris.Urmeaza apoi durata de timp in minute , si apoi motivul.In final comanda va arata in felul urmator: *ghilimele sunt obligatorii In mod normal , ar trebui ca comanda sa fie executat cu succes si jucatorul banat.In cazul in care va da eroare , inseamna ca : 1.Nu ati folosit ghilimelele imediat inainte si dupa nume , dupa cum era explicat mai sus. 2.Nu ati notat corect numele sau STEAM_ID. 3.Jucatorul a iesit de pe server dupa ce ati facut pozele , si inainte ca voi sa scrieti comanda in consola , a intrat inapoi cu alt nick . ATENTIE: comanda amx_addban NU functioneaza pe ip-uri care sunt in continuare pe server. Daca ati verificat si sunteti siguri ca ati scris corect comanda , ip-ul , numele , ati pus si ghilimelele , atunci ca trebui sa va uitati care din jucatorii de pe server sunt noi intrati ( au scor gen 1-0 , 2-0 , etc ) si sa folositi comanda amx_status . IP-ul pe care vi.l arata in consola il comparati cu IP-ul jucatorului pe care ati vrut sa il banati.Va dura un pic,dar il veti gasi intr.un final Dupa ce l-ati identificat, nu va ramane decat sa folositi amx_ban nume 0 nep.ss Cand executati comanda de ban/exterminate nu mai puneti la motiv "pa...jet, etc" ,puneti motivul pentru care ati dat ban .. nep.ss , nep.wgD , aim , speed , wall , etc Nu uitati sa faceti demo, screenshot jucatorului pe care il banati!! Asta pentru a nu avea surprize la cererile de unban si a nu fi acuzati ca ati dat ban pe nedrept. O zi minunata! [EN]: 1. Type `amx_last` in the console, and a list of players who have left the server will appear 2. Type `amx_addban ` in the console, then immediately after the double quotation mark, right-click, and then left-click on "Paste." After the complete player name has been inserted, put another double quotation mark (") (I personally write `amx_addban " "`, then bring the cursor between the two (") for pasting). 3. At this stage, you will have: amx_addban 4. Continue writing the command with the player's SteamID, which appears on the same line as the name, in the order: name-SteamID. Select the STEAM_ID, copy it (Note: Only mouse-clicking functions as CTRL+C shortcut!), and then paste it after the already-written fragment of the command. Next, specify the duration in minutes and then the reason. In the end, the command will look like this: *Quotation marks are mandatory. The command should be executed successfully, and the player should be banned. If an error occurs, it means that: 1. As explained above, You did not use quotation marks immediately before and after the name. 2. You did not note the name or STEAM_ID correctly. 3. The player exited the server after you took the screenshots, and before you wrote the command in the console, they re-entered with a different nickname. ATTENTION: The amx_addban command does NOT work on IPs that are still on the server. If you have checked and are sure that you have correctly written the command, IP, name, and have also used quotation marks, then you should look at the players on the server who are newly joined (have scores like 1-0, 2-0, etc.) and use the `amx_status` command. Compare the IP shown in the console with the IP of the player you wanted to ban. It may take a bit, but you will eventually find them. After identifying them, all that's left is to use `amx_ban name 0 nep.ss`. When executing the ban/exterminate command, do not use reasons like "bye...jet, etc.", put the reason for which you gave the ban: nep.ss, nep.wgD, aim, speed, wall, etc. Don't forget to make a demo and take a screenshot of the player you are banning!! This is to avoid surprises in unban requests and to avoid accusations of unfair banning. IP Address More about this IP address Link to comment Report Share Reward puneilapamant Edit Recommend
-
[ CSGO ] - Cerere admin stefiaimbots ( Acceptat )
.FearLess.. a răspuns la topic lui stefiaimbotss1 în Admins
-
[ CSGO ] - Cerere admin Antonyo [GGTX] ( Acceptat )
.FearLess.. a răspuns la topic lui Antonyo în Admins
Contra -
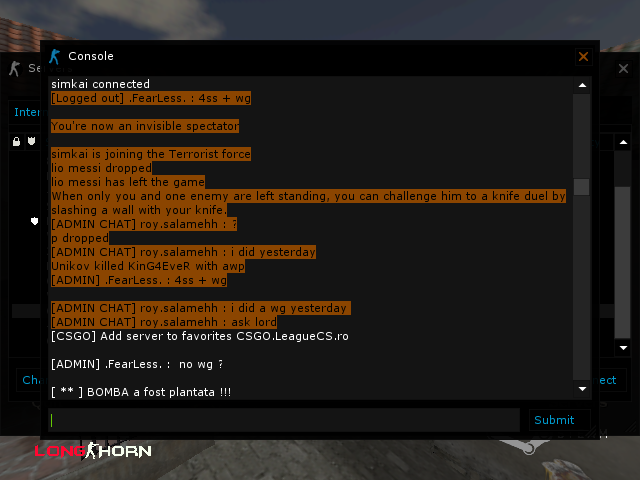
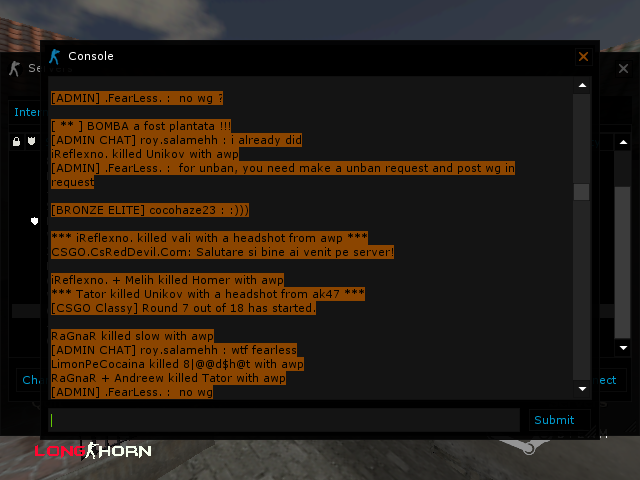
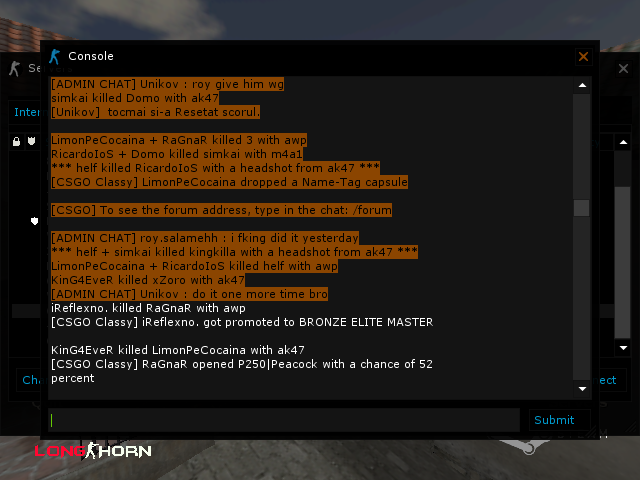
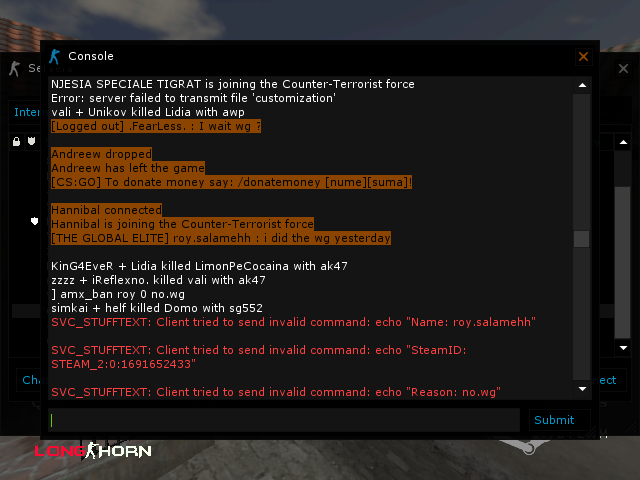
[ CSGO ] - Cerere unban roy.salamehh ( Acceptat )
.FearLess.. a răspuns la topic lui roy.salamehh în Request Unban
-
Nume: roy.salamehh IP și SteamID: 176.29.241.10 si STEAM_2:0:1691652433 Data și ora: 3/09/2024 ora 16:32 Perioada: permanent Motiv: no.wg + no.ss Dovezi(Demo/Video/Poze):
-
, cauta-ma pe discord fearless8538
-
Am inteles ca ai experienta, ca ai 4 ani pe forum, dar sa citesti putin regulamentul ala ai putea, te astept sa dai un edit la cerere si sa corectezi ce ai gresit
-
[ CSGO ] - Mariri Admini / Raises Admins
.FearLess.. a răspuns la topic lui K.o.D. în [ CSGO ] - Staff Area
Nickname: Night Gianni Grad vechi / Old rank: Moderator Grad nou / New rank: Super-Moderator Motiv / Reason: Activitate